Final Cut Pro X Babbling

Deep Thoughts about FCP X, and why you should be using it.

Non-Scientific Random Pointless Comparison

Posted by fcpxpert1 on March 11, 2014
Posted in: Random Junk. Tagged: Adobe Premiere Pro, FCP X 10.1, Real Time. 3 Comments

So, While I procrastinate the writing of my next, exciting, Magnetic Timeline post, I thought I’d throw up (pun intended) this little nugget. I recently watched a demo of Premiere CC running on a new Mac Pro. There was a little section on real-time interaction with the app, followed by a demo of mixed format 4k real-time performance. Like many of the Mac Pro demos, it was pretty impressive. What got my curiosity up though, was the first section about real time interaction with the app, i.e., editing while playing back. The media used in this section was not specified, but I doubt it was 4k, if anyone knows please chime in. Have a look below. The relevant portion begins about 2 minutes in and is about 2 minutes long. The rest of the video is cool, but irrelevant to my pointless demo…

So… after watching this, I was curious how FCP X (And PrCC) would perform with a similar timeline on the computer I happened to be on at the time. It was not a Mac Pro… So, I grabbed some 1080p H264 clips and did a little test, which runs about 4 minutes:

http://youtu.be/QdZvuwHWz_Q

Then, to be fair, I did the same thing with PrCC. This takes a little longer, about 8 minutes:

http://youtu.be/T5hNV_ymNZ8

So, that’s 15 minutes of your life you’ll never get back. What’s my point? Didn’t really have one, just thought it was an interesting comparison. I own rent Premiere. I use it, and FCP 7 for that matter, when I need to. I much prefer FCP X.

Anyway, I think the takeaway here is that I want a Mac Pro, no matter what I’m gonna run on it. Also, Halloween Parties are fun. 🙂

Addendum: It was pointed out to me that the Pr “Dust and Grain” effect (analog to the “Aged Film” effect I used in X) is not GPU accelerated, so that may be why Pr choked near the end of the “demo”.

(Part 3) *Not* Fighting The Magnetic Timeline-Storylines

Posted by fcpxpert1 on February 27, 2014
Posted in: FCPX At Work, Timeline Tips. Tagged: FCP X 10.1, Magnetism, Video editing. 8 Comments

Back again with more babbling. To recap… some people find… ah, screw it. I had envisioned this topic as a linear series of posts for folks dipping their toes into X, talking about my editing process… A-B-C-D etc. Turns out my brain doesn’t work that way. Maybe that’s why FCP X appeals to me. 😉 So I guess I’m just gonna write a little bit now and again –  in no particular order – about unique things I like when working with, rather than against the FCP X timeline. This little post will be about Storylines.

The Primary Storyline. Use it.

I, and others, have  said that the best way to get acclimated to the Magnetic Timeline is to fill the storyline with gap, and cut everything in as connected clips and disconnect the audio. I did it at first. It works kind of like you’re “used to” working. And it sucks.

1-oldbreak

Or, you could use connected clips but keep the audio components connected to maintain sync. You get the benefit of audio components/expansion too. But it’s a mess.

1-old expand

Or, don’t fight it. Use the Primary Storyline. 

1-primary

All nice and neat. Use the Position Tool (P) to move clips without rippling. Hold the tilde key while adjusting clips (~) to temporarily disable connections.  Press and hold tilde (~) then press SHIFT and release both keys to lock connections off. Press tilde again to re-enable connections.  This cursor let’s you know connections are disabled.

cursor

Secondary Storylines Are FCP X “Tracks”

When working with Connected Clips, if you want to butt clips together and put transitions on them outside the Primary, X will put them in a Secondary Storyline for you.

con-comp

Making secondaries is really just like making a new track in other NLE’s. But, you only do it if you need one, which you do if you want to put a transition effect between clips. So… why else would you need one?

Well, maybe you’d like to cut a music bed first, lock it, and edit to that… without having each clip of your music cut move because it’s “connected” to the primary clip above it. Maybe you have a bunch of little clips you want to keep together or easily move as a group. Whatever. Think of storylines as tracks you can move around if you want to. Add gap at the front end and pin it to the head of your timeline and it’ll behave exactly like a track.

secondaries

What you can also do, that you can’t do in tracks, is expand the audio in storyline clips and do a nice manual crossfade. so it takes the place of 2 (or 4) tracks in other NLE’s. And you can select and manipulate clips in a storylne just like any connected clips in the timeline.

Storylines are also useful if you want to keep a group of clips together for visual organization. Again, just like tracks.

Make new Storylines by selecting a clip and hitting CMD-G. If you forward (SHIFT) delete the clip after this, it’ll leave an empty secondary if you need it.

Spare “tracks”

sparetracks

And while you’re at it, Never disconnect your sync audio. Unless you need to cheat some dialog or something, leave the sync audio components with your video clips. If you know there’s a stem you won’t ever need, disable the component for the master clip. In my case, I hardly ever need the Music from a split source, so I just turn it off in the master clip.

disablecomponents

That way, every clip I cut in has the sync Dialog and Effects with it. I can turn either on or off in the timeline clip(s) as needed, but it’s always there, I never need to match back to a clip to “find” the audio I didn’t think I needed. This essentially takes the place of track patching, but you only need to do it when you want to, not every freaking time you cut in a clip. 

It’s also trivially easy to do an A/V, Video only, or Audio only edit. Hit Shift 1,2, or 3 before you cut in your clip.

ft2-patching

Next up (in some random order) Fun with Audio Components, Managing Clip Connections, Compound Clips, The Timeline Index, and anything else I can think of. Happy cutting!

(Part 2) *Not* Fighting the Magnetic Timeline-Roles

Posted by fcpxpert1 on February 21, 2014
Posted in: FCPX At Work, Timeline Tips. Tagged: FCP X 10.1, Magnetism, Video editing. 5 Comments

To recap… some people, coming from other NLE’s, find the FCP X Magnetic Timeline… disorienting. And that’s being kind. No tracks, crazy connection lines everywhere, clips jumping around by themselves, it’s  a mess! Madness! But… there’s a method to the madness. And when you work with, not against, FCP X Magnetism, it’s quite nice to work in, warts and all.

Now, if you’re happily using X you probably won’t find this too interesting. Like all my babbling, this post is primarily directed at experienced folks who are trying to give X a shot and are getting stuck. And, as usual, I’ll probably skip important things, and dwell on minutiae. Feel free to ask for clarification in the comments.

Also,there will be a Part 3, on this topic. And 4 etc. It seemed like it would be a simple post when I thought of it. Oh well…

Since I usually have fairly uh, busy sequences, I figured the best way to talk about the Magnetic Timeline would be to talk a little about my workflow on a typical project. I fought against magnetism for quite a while, and it kinda sucked. But over time, I’ve stopped fighting it, and grown to (mostly) really like it. Your mileage may vary… 🙂 This isn’t a tutorial, just my experience, so forgive me if I gloss over some things as I go. And I assume you have at least a passing familiarity with FCP X. So… the first, and arguably most important thing you need to do is:

Set Up Your Roles!

ft2-roles5

Roles take on the majority of the organizational functions of tracks in other NLE’s. If you don’t set your Roles properly, your Project will quickly become an unmanageable nightmare. This is especially true for audio, as there is generally much more of it in the timeline. In fact, pretty much everything in this post pertains to audio, though what I’ll talk about is generally true of video as well.

The “built in” Roles in any new Event are Video, Titles, Dialog, Music, and Effects. You can create and assign as many Roles and Sub-Roles as you need. There are a couple custom Roles in the example above. The more detailed your Roles, the more precise your ability to interact with the Timeline will be. 

When you import a clip to X, video automatically gets assigned a “video” Role, and any audio with the video gets assigned a “dialog” Role. Imported audio will often get assigned to “dialog”, no matter what it is. Always double check the Role of any clip after you bring it in to an event.

You can assign Roles to clips in the timeline via the Inspector, but it will only change the timeline clip(s). This is quite useful later in an edit for creating sub-roles etc, but do it first in the Browser and it’ll carry into every project in which you use that source.

Hey, this isn’t dialog! I better fix it.
ft2-rolesbrowsergd

Take a few seconds to do that as you bring in each clip. You can set Roles on multiple clips if you bring in a folder of music or effects or whatever. You’ll be glad you did.  Since I generally get video with multichannel split tracks embedded in it, I need to set Roles for the embedded stems in my master source. Select the master clip in the Browser, open it in a Timeline, and set the proper roles for each channel.

1-Open the clip(s)                 2-Select the channel(s)                            3-Set the Role(s)
ft2-roles0

In addition to allowing you to do a nice split audio output with the click of a menu or two, Roles allow you to Mute, Solo, Locate, Select and Manipulate clip(s) from the most overlooked (IMO) part of X, the Timeline Index. More on that in, I dunno… Part 3 or something…

I’ll skip over all the other stuff you normally do before starting a sequence… Selects, Favorites, Keywording etc. There are lots of actual tutorials on that. If done right though, it’s really really easy to find footage you’re looking for as you cut.

Starting The Cut

First thing I do is create a new Project, and set a usable view. No giant thumbnails, no connections, and the lowest basic clip height. The examples below are obviously an existing sequence.

ft2-viewgood

I’ve also made custom shortcuts to switch between the “working” view, and a super minimized view that I use when I need to see everything in the timeline.

ft2-cliphgt

Anyway, back to the empty timeline… I cut a second or so of my main source video in as a connected clip to auto-set the resolution and frame rate. Just my preference, you can manually choose any Project Settings you want when you create your project. Then, I’ll drag out the Gap clip that gets created to some arbitrary length, generally longer than I expect the cut to be. I like to stash unused bits and pieces at the end of the timeline as I go, so this leaves some space to do so.

ft2-empty

Next I’ll delete the random clip, cut in my handy slate generator (you can make useful things like this in Motion even if, like me, you have no idea what you’re doing) and start to build the cut.

Cutting in FCP X, surprisingly, is just the same as in any NLE. 😉  Just Don’t Fight The Timeline. Observe, see how it works, and go with it. It’s fun! lol I generally assemble things as connected clips, and “commit” them to the Primary when they’re done-ish. Forget about carefully getting the clips to line up horizontally. Let it go. Just stack and drag and trim ’til they’re good and then dump ’em into the primary for fine-tuning.

ft2-con2prim1a

You can drag and drop clips if you want, but there are plenty of Keyboard Shortcuts. Many are the same as in FCP “Classic”. In FCP X, the biggies for me when cutting are Q (connect), W (insert), D (overwrite) and E (append). Use these in conjunction with SHIFT-1 (Audio and Video), SHIFT-2 (Video only), and SHIFT-3 (Audio only). Those’ll get what you want into the cut. In the Timeline, the main ones I use are V (disable/enable the clip), OPTION-S (Solo) , CMD OPTION-S (add to Solo group), CNTRL-S (expand audio/video), CMD-4 (open/close Inspector), CMD-5 (open/close FX Browser). There are a zillion more, and you can of course make your own. Spend some time with the command editor, there’s some great stuff in there!

Also, leave your sync audio connected to video. There are reasons to disconnect it, cheating dialog, using a sync effect in multiple places etc. But in general, don’t. I’ll talk about this more in a future post. 🙂

And with that tease, I guess I’ll stop Part 2 here. In later installments I’ll talk about The Timeline Index, Managing Connections in a complex timeline, Secondary Storylines (tracks!), Compound Clips, fun with Audio Components, and whatever other random, disorganized thoughts pop into my head.

Thanks for stopping by!

(Part 1) Fighting The Magnetic Timeline

Posted by fcpxpert1 on February 18, 2014
Posted in: FCPX At Work, Tips. Tagged: FCP X 10.1, Final Cut Pro X, Magnetism, Timeline Index. 4 Comments

One of the biggest “issues” people coming from other NLE’s seem to have with FCP X is the how the Timeline works. Magnetism! No Tracks! Storylines?! It’s crazy! As I’ve said before, probably the best way to get acclimated to it is to put a chunk of Gap (slug) into the Primary Storyline and just cut with connected clips. Then it pretty much behaves like what you’re used to. And by “pretty much”, I mean you can grab or lasso clips, drag ’em around etc, and they all stay put relative to the sequence time.  You can use transitions as well, FCP X will automatically create secondary storylines as needed when you apply them.

Old Skool 🙂
OLDSKOOL

Despite the lack of tracks, you can SHIFT-Drag (to maintain sync) to vertically arrange clips so that, say for audio, VO is up top near picture, then FX, then Music. However, every clip is going to want to stick to the Primary, so if you have 5 nicely stacked clips in one section, followed by 2 clips in another… they’re not gonna line up horizontally.

Now, my premise here eventually is… who cares? But, if you do, you can either create empty secondary  storylines to use as separators, or, as I still do sometimes, record a long clip of silence, connect it to the first frame of the sequence, give it a unique Role, minimize and mute it, and drag it out to length. he latter is preferable as it takes up less space. Also, you can put “sequence markers” on these as well, which is kind of nice. I think eventually this workaround won’t be necessary, but for now it does the trick.

Whether you work with or against Timeline Magnetism, It’s really important to properly assign your Roles from the get go. If you do,  You can use the Timeline Index to mute or solo elements, select and modify common properties of multiple clips (or transitions) at once and a boatload of other really useful things.

solo-mute

So, that’s how to kind of cut in X by doing everything you can to counteract the magnetic timeline. In “Part 2, Not fighting The Magnetic Timeline”, I’ll tell you why using the preceding methods sucks, and how embracing Magnetism makes editing fun! And I’m not talking about sequences like you see in tutorials with nice long shots and a 2 or 3 layers of audio which make dealing with connections fairly straightforward. The project below has around 36 tracks, or 18 stereo pairs. There are a lot of connections, but if you use X like X, it’s not a big deal to manage. If you try to use X like 7 or Pr or MC… It’ll get ugly pretty quickly, which is I think what tends to happen to some folks.

a bunch of clips

Given my posting schedule of late, it may take a while for Part 2 to appear, but I’ll do my best. Happy Editing!

I’m Still Here….

Posted by fcpxpert1 on January 25, 2014
Posted in: Opinion. Leave a comment

I’ve been lurking. OK, I’ve been working. It really interferes with my my babbling. 😉 Eventually I’ll spew out some long winded something or other. Until then, just grinding away here in Hollywood with FCP X. It still doesn’t suck. Speaking of Hollywood, the worm may be turning here… More on that if I can get any actual info.  Until next time…

FCP 10.1, DAY 1 – Tips For Updating

Posted by fcpxpert1 on December 16, 2013
Posted in: FCP X 10.1, Tips. Tagged: FCP X 10.1, Final Cut Pro X, Final Cut Pro X 10.1. 1 Comment

Final Cut Pro 10.1 is here!  Along with updates to Motion and Compressor! All are free updates. There’s a lot of info flooding out right now, and I’ll leave it to others to talk about all the cool new features and goodies in these updates. This, my little contribution to the deluge of information, is about updating your existing FCP 10.0.x work to version 10.1. There have been some major changes, good changes, to how FCP X organizes stuff, and I hope my post will help to explain it a little bit. And by ‘post’, I mean ‘novel’… It’s way longer than I thought it would be. But it’s really entertaining! With pictures and stuff!

apps

For the record, I’m not “certified” as anything, except maybe insane, as I started madly moving all my work into FCP 10.1 the second it appeared. I’ve cheerfully ignored the “don’t upgrade in mid-project” mantra, and updated all of my wildly varied Projects and Events. I am very tired. However, you’ll be happy to know that updating your work is really quite easy.

Apple has a very good white paper on this process, and there are detailed instructions available via the Final Cut Pro 10.1 “Help” menu. What follows comes from my experiences when updating, and it’ll hopefully make it a little easier for you. I do suggest reading the official Apple info, just in case I’ve missed anything. Also, as you’ve no doubt heard, you will need to update to OS X Mavericks to run 10.1.

A Word (ok, a lot of words) About Organization.

For lack of a better term, I’ll be using the word “job” throughout this post to refer to associated sets of 10.0.x Events and Projects. Remember, a 10.0.x Project is always associated with an Event. They are connected. And since they’re connected, It’s easier to refer to all the Projects connected to an Event or Events, combined with the Event(s), as a “job”.  Fewer words. 😉

libicnFCP 10.1 does away with this arcane method of organization and puts everything in Libraries. A 10.1 Library contains multiple Events and Projects in the same location. No more Project Library. To work with existing 10.0.x material, you need to convert (update) your associated Project(s) and Event(s), aka jobs, to Libraries.

I’m pretty careful about keeping track of these associations, and I updated each of my nicely separate 10.0.x “jobs” one at a time to become individual 10.1 Libraries. I’ll explain how I updated below. But maybe you only have a few “jobs”. Or perhaps you’re not as OCD as me. You might not remember that at some point you created a Project associated with a particular Event, but you did. In this case, the best strategy, and the strategy Apple seems to favor, may be to update all your jobs at once.

When it updates your jobs, FCP 10.1 will create a separate Library for each connected drive containing online (not hidden) FCP 10.0.x Projects and Events. So, by updating all your jobs/drives at once, you don’t have to figure out the associations beforehand. And there’s no need to hunt through Events for your projects when you’re done.

When a Library is created by updating – even if  you update multiple Events and Projects at once- the original Events will all appear in the new 10.1 Library. And your Projects – no matter which Event in the job they were associated with – will be put into one new Event (named “Updated Projects”) in this Library. What happens – more or less – is FCP 10.1 puts the contents of your old Project Library into this Event in the new 10.1 Library.

The Library created from a disk named X-DRIVE

updatedproj2

Of course, everyone works differently. As I said, I have a lot of pretty well organized jobs on my disks. So I updated separate jobs on each finderfiles2disk, rather than everything on the disk. For more advanced users this may be an option.

In FCP 10.0.x I use the now free Event Manager X (EMX) to create job sets that I can open and close separately. When I updated these jobs, I used EMX to do them one at a time. To be clear, it is not necessary to use EMX when updating. It made sense for me, because I already use it and it worked well for what I wanted to do.

Each of my FCP 10.0.x jobs consists of Event(s), and associated Project Library folders (containing multiple Projects) with the same name as the Event(s) the Projects are associated with. The folders were all created in the FCP X Project Library, not in the Finder. All Projects associated with the Event(s) go in those named folders. I then use EMX to hide or open only the sets containing associated Projects and Events. My “jobs”.

If that seems confusing, the picture on the left shows my Project and Event folders as they appear in the Finder. Only one “job” (ELYSIUM) is online, all other jobs are hidden (offline). My “jobs” can contain multiple Events and folders of Projects, but they’re all associated.

I’ll touch on this stuff again below. In fact, there will be a lot of redundancy as I prattle on here. Sorry.

By the way, all those job names are totally fake. I only cut home movies and YouTube cat videos in FCP X.

Again… if you’re less of a geek than I am, don’t have many “jobs”, or don’t really organize your stuff in any meaningful way, it’s probably best, and likely easier, to update everything at once. Having all your work online at the same time – and all of your drives connected – will result in fewer possible issues with unlinked media. FCP 10.1 will create one Library for each connected disk. If you use Disk Images to keep your jobs separate in 10.0.x, you’ll really like the update process.

For example, if you have Project and Event folders on four connected drives (i.e. Macintosh HD, two Disk Images, and a Thunderbolt drive) You’ll end up with four corresponding Libraries. After you update you can then sort things into additional new Libraries you create, and/or to new Events or Keyword Collections within Libraries. I’ll get back to that below as well.

If you’ve gotten this far without falling asleep, I’d suggest reading this whole post first before you do anything. It’ll be fun! Hopefully the process will then make sense, and you can decide which updating method, individually or all at once, you’re most comfortable with. Updating your work to 10.1 is easy, But I think doing a little organization first in 10.0.x. is a good thing. You don’t have to, but it helped me.

~OBLIGATORY DISCLAIMER~
If this all goes wrong, (it won’t), your Mac erupts in flames and the earth swallows you up. . .
It’s not my fault. This is a random, unofficial blog on the intertubes!
The following advice is for entertainment purposes only!!

Ready…

Once you’re all organized, but before you install FCP 10.1, make backup copies of everything. This includes your old 10.0.x app itself (.zip it by Control Clicking it and choosing Compress…), all original Projects and Events, and even your Motion Templates folder just to be safe. If you back up to an attached drive, put all these copies inside a folder on that drive so FCP 10.1 won’t see them when you begin updating. You want your backups to remain unchanged.

backupnew2

You can also remove all your preferences using Digital Rebellion’s Preference Manager if you want. For what it’s worth, all I did was back everything up, install the new apps and update my jobs. You should probably be more cautious than I am, but for me updating was a very straightforward, trouble-free process.

A Short Editorial…

For those of you who’ve been using Compound Clips as faux “projects”. . .  In my opinion (which you are free to ignore) you might want to convert them to actual projects before you update your jobs to 10.1 Libraries. To do so, in FCP 10.0.x, take any sequences you’ve cut in CC’s that you plan on bringing into 10.1, edit them into new, empty projects, and break them apart.

Any Compound Clips that are just used as Compound Clips (meaning those that are not projects that you’ve cut in CC’s to avoid the Project library) will be fine. And honestly, your “project” CC’s will be fine too. Like I said, this is just my opinion.

If you’re cutting spots, shows, trailers… whatever, in CC’s instead of projects, I think you will be happier if you convert them to actual projects. Among other reasons, the great new ’snapshot’ feature only works for Projects. Also, as noted above, 10.1 puts updated projects in one place, CC’s will still be in their original Event(s) in the Library after updating. Not a big deal, but… inconvenient.

To be perfectly clear, this isn’t required at all, it’s just my preference. If you don’t do it first, you can always do it anytime after you update your 10.0.x “jobs” to Libraries. Or not at all. Nothing will get screwed up if you don’t.

Alright, enough editorializing. . .

If you’ve trashed your old preferences during your backups and preparation, make sure everything is set correctly after you install 10.1. Particularly the FCP X “Media Storage” preference (Copy to Library or Leave in Place). Again, not required, just a suggestion. I use shared media, so I leave files in place. The steps below (there really are steps below, honest!) will work whether you have your original media stored in your Events, or externally linked.

prefs1

Set…

Just to redundantly reiterate what will be going on. . . when you choose the “Update Projects and Events” command and select an option, FCP 10.1 will make a new Library from each available set of Event/Project folders it sees on every connected, mounted drive. 1 drive = 1 Library, 2 drives = 2 Libraries, etc.

pick an option…
options

this will happen…
newlib

You can also navigate to specific Folders, disks or SAN locations which contain 10.0.x Event and Project folders and update those “jobs” individually. During the update, 10.1 will move media to the new Library, but it does not duplicate or delete any media. So, even if the update process takes a while, don’t worry about that.

If you have Original Media in your 10.0.x Event it will be moved (not duplicated) to the new Library. If you use linked (shared) media, it will stay in place wherever it is, only the links will be moved to the new Library. Painless.

Be aware that for each “job” or set you update, it is important that you have all the Events associated with your Projects in each “job” or set online. If a Project references Events on other volumes, just be sure they’re all online when you update. The same holds true if you’re updating everything at once, with EMX, manually locating, or by mounting disks or SAN locations. 

If you do have Projects – or Compound or Multicam Clips in your Projects – that don’t have the associated Events they’re linked to online when you update the set… you’re going to need to spend some time re-linking stuff. It’s not a big deal but it is kind of annoying. I learned this the hard way.

relink

If, for some reason, you don’t know how to relink, simply choose “Relink Files…” from the File Menu, and let X find, (or point X to) the offline items it lists. I think it’s better to take your time before you start so you don’t have to do this though.

A Note from The Novelist…

To tell the truth, everything I’ve written so far is basically just to prevent you from updating and ending up with a bunch of offline media in your shiny new Libraries. That, at least in my experience, is the worst thing that will happen. The update process is pretty much idiot-proof. I was actively trying to screw it up at times (I made good backups first!) and all my work survived.

The next section talks a little about preparing your jobs for updating with the help of EMX. If you don’t plan on using EMX – if you have any qualms at all about EMX – just skip to the actual steps that follow.

Using Event Manager X When Updating Jobs

If you don’t have it, get the latest version of EMX. You can create job sets, and then load and update each individual EMX set to create individual 10.1 Libraries. Advanced users can create, load, and update individual job sets manually, but it can become complicated. EMX simplifies this process.

If you’re at all confused by EMX or the individual job update method, I recommend updating all your work at once. As you’ll see later, it’s very easy to reorganize it after updating.

I made all my EMX Sets before I installed FCP 10.1. Then, after installing 10.1, I used EMX to load individual job Sets for updating. You can make Sets after you install 10.1. Just don’t choose “Update Projects and Events…” from the FCP “File” Menu until you’re done preparing your EMX job Sets, as each time you update a set, the original Project and Event folders will no longer be available to EMX.

Perform the following steps with FCP X closed

— Open EMX. Un-check the “Re-open Final Cut Pro X” preference in the main window of EMX. This prevents FCP X from opening automatically when you perform actions. Nothing bad will happen if FCP opens, it’s just unnecesary for what we’re doing…

emxuncheck1

— In EMX, create sets of your 10.0.x Events and their associated Projects. Click the pic below for a bigger version. If in doubt, detailed instructions are in the EMX help.

1-select ‘All Off’ in the “Set” menu. (you must do this before creating each set!)
2-check the associated Event(s) and Project(s) for your first job set. Click the + button
3-Name your job set and click ‘OK’.

Repeat Steps 1-3 for each Set you’d like to create.

emx-sets2

— When you’re done, and have installed FCP 10.1, choose a set from the “Sets” Menu. Make sure everything you expect to be included is selected, and click the “Move Events and Projects” button. That will load your first set. Then, to update it to a Library proceed to step 1 below…
set choose

Note: If FCP X is open when you click the “Move…” button, X will quit. Don’t worry about it.

All backed up? Have you read all the documentation? EMX users have your sets all ready? Good! Install your new apps and let’s update stuff!

OK, Let’s Do This!!

1- Open FCP X. Don’t worry, 10.1 will not update anything until you tell it to. The first time it opens, it will create a new default Library. It might ask where you want to save it, I honestly don’t remember. The new Library will contain an empty, date stamped Event. FCP 10.1 requires that at least one Event exist in a Library, you can’t have an “empty” Library. Leave that Library alone for now, you can delete it or use it later.


2-
 In the FCP X “File” menu, click the “Update Projects and Events…” command. A dialog box will appear. If you have an EMX set loaded – or have jobs in your local Project and Event folders and/or on connected disks that you’d like to update all at once – select “Update All”. Alternately, you can “Locate” (point FCP X to) specific Disks, Folders or SAN Locations to update them individually. The dialog explains it well, and the “Learn more…” link provides much greater detail if you need it.

UPDATE DIALOG

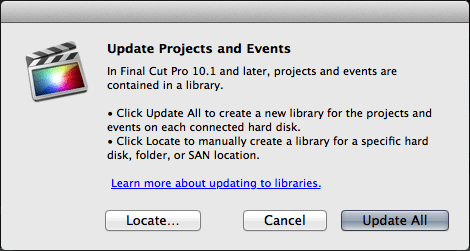
Whatever option you pick, FCP X will then create a new Library for each connected disk or specified location. Each Library will be named  “(location name)’s Projects and Events”. In this Library will be all the Events that were present in each 10.0.x “job” set (whatever was online or you had Located), as well as an “Updated Projects” Event. If you had your Projects sorted into sub folders in the old Project Library, they’ll still be nicely sorted in Keyword Collections in the new 10.1 Library.

post update

When it finishes updating, you will be prompted to save or discard the originals. I suggest saving them ’til you’re comfortable with the update process. If saved, 10.1 moves your original Event and Project folders into a new folder it creates (in the same location as the originals) called “(location name)’s Old Final Cut Projects and Events” should you need to access them for whatever reason. If not saved they will be moved to the trash.

save

Make sure everything came over as expected. You can then rename the new Library and any Events and/or Keyword Collections it contains if you’d like.

If you updated everything at once, you’re done. E Z. 🙂

If  you have more individual jobs you’d like to update, proceed to step 3 (using EMX) or 3A (Manual Updates).

3- If you’re using the Event Manager method, quit FCP X (Not really necessary, but EMX does this automatically when you choose Move Events and Projects as it’s designed for FCP 10.0). Then, Select and Move the next set of Events and Projects, re-open FCP X, choose “Update All”, and repeat ’til done.

3A- If you’re not using EMX, and you’re updating individual “jobs” manually, you need not quit FCP X for each job set you update. Just create additional new “job” sets and ‘Locate’ them (see below), or mount additional disks or SAN locations, and choose “Update All” for each “job” you bring online.

Manual Job Sets

A little tip for those who manually hide and load  jobs. If you have folders or “offline” locations containing jobs you’d like to update, just stick your job folder pairs (Projects and Events) in properly named parent folders, then “Locate” each in turn to create individual Libraries. This trick also works if you missed a job while updating, or need to update an old, archived 10.0.x job or something.

offline items

And… You’re Done.

That was easy wasn’t it? 🙂 The great thing about Libraries in 10.1, is that by design, they always contain every bit of media needed for the projects within them. If you cut a clip from an Event in one Library into a Project in another, it copies the clip, (or the link to the clip if you leave media in place) into that Library. No more dependencies. Very nice.

Cliff Notes:
**If you want to update everything at once, make sure it’s all online using your preferred method and just perform 
steps 1 and 2 above**

**If you’re updating individual jobs, and use Disk images/San Locations, mount each of them (or as many as you’d like to update at once) and perform Steps 1, 2 and 3A.**

**If you’re updating individual jobs, and have 10.0.x Event/Project folder sets stored within folders anywhere, even if they’re “offline”, just navigate to (Locate) each job folder and perform Steps 1, 2 and 3A.**

Events and Libraries

So… You’ll end up with one or more nice, organized Libraries full of Events and Projects. Now what? Other than Projects and Events now being in the same place, the way you organize things in 10.1 is similar to previous versions.

Events in 10.1

Events function more or less the same as before. You can make as many Events as you’d like in a Library. You can move clips/media, or copy/duplicate collections and other metadata between different Events within a Library.

COLCOPY2

Projects in 10.1

Projects in 10.1 are also pretty much the same. Personally, I keep all Projects in their own Event in each Library, and organize them in there, but you can put them anywhere in the Library you want. The biggest new Project-related feature is Snapshots. Simply stated, a Snapshot creates a date-stamped duplicate of a selected Project.

But, it’s better than a duplicate because… If you have Compound Clips or Multicam Clips in the Project, it makes them self contained. They no longer refer to the original Compound or Multicam clip parent clip – they now only exist in the Snapshot.  You can of course still edit them, break ’em apart, whatever… but doing so will have no effect on any other Compound or Multicam Clips. It’s a really nice feature.

snapshot2

Remember though, if you choose to duplicate a Project rather than make a Snapshot, any Compound or Multicam Clips it contains still refer back to a parent as in previous versions of FCP X.

Either way, duplicated normally or as Snapshots, Projects in a Library now share render files. In 10.1 you can also delete Render Files from multiple selected Projects at once, as well as from multiple selected Events in a Library. Nice.

Libraries in 10.1

Libraries essentially act like individual mounted Disks or SAN Locations did in previous versions of FCP X. You can copy  and move things between separate Libraries. Anything you drag and drop from one Library to another gets copied to the target. All the necessary media (original clips or links to shared media depending on your prefs), Keywords, Keyword Collections, etc will come with it. You can Move Events from one Library to another as well, with the Edit Menu “Move…” command. Remember though, you have to have at least one Event in a Library, so you can’t Move all the Events from one Library to another.

Organizing Your New Libraries

You can have multiple Libraries open at once, and open and close them with a normal “Open…” command. Finally! Also, if you hold the “Option” key down while launching FCP 10.1 an “Open Library” chooser will appear. In addition, Clicking and holding the FCP X dock icon will let you select and open recent Libraries.

secretopen3-1

If you want to easily share Project(s) or Event(s), then moving or copying material between multiple Libraries is straightforward.

With a “source” Library open, create a New Library. New Libraries will, by default, contain one empty date stamped Event. Rename it and/or add new Events etc as you see fit.

edit menuTo COPY items and leave the source Library unchanged,  select whatever you’d like, and use the “Copy (item) to Library…” Edit Menu command. (“item” changes depending on what you’ve selected). Or just drag whatever you’d like, individual Projects, Events etc. from the source Library into the new Library. Events can be dropped onto the target Library to copy them. Other items, individual clips, projects etc,  must be dragged to an Event in the target Library – don’t try to drag them directly to a Keyword Collection.

Selected items will be copied to the target Library. All your Keywords and everything else needed will come with them. Linked media will stay where it is, Original Media contained in the source Library will be duplicated into the Target Library. The source Library will not be modified. Everything will remain in place unless you choose to delete it from within the source Library.

To MOVE items out of the source Library to another Library,  select whatever you’d like, and use the “Move (item) to Library…” Edit Menu command. (again, “item” changes depending on what you’ve selected) You can’t move items via drag and drop, you must use the Edit Menu command.

Selected items will be moved to the target Library. All your Keywords and everything else needed will come with it. Linked media will stay where it is, Original Media contained in the source Library will be moved into the Target Library. The source Library will be modified. Everything you moved from the source will… uh… be moved.

SAN Locations, Disk Images etc will work as before if you want to store Libraries on them, but you no longer need to use them to open and close jobs. No more mounting / un-mounting nonsense. You just open and close Libraries in FCP 10.1 like any other file.

One limitation… you can’t duplicate an entire Library via the edit menu or a contextual menu. If you need to do this, you’ll need to create a New Library, select everything within the Library you want to duplicate, and copy it all into the New Library. Then you can save the new Library to wherever you want. I guess you could just make a duplicate in the Finder, but I don’t like doing that. I try to do all copying, moving etc from within FCP X. It’s up to you…

Screen Shot 2013-12-08 at 10.43.18 AM

Now Get Back To Work!

Hopefully this basic, slightly rambling overview will help you get moved to 10.1. The FCP X team has done a great job of making it a really painless transition. And with Libraries, collaboration is now really simple.

The 10.1 user interface is not wildly different, but the app is a lot better. It has some important fixes, updates and cool new features. One of my favorites is the new keyframe behavior. Try it! Some menus are new, revised and/or rearranged… so poke around in the app and check out the differences as some things have moved. A million articles will soon appear to detail all the goodies.

There are also a ton of “under the hood” changes: FxPlug 3, vastly improved XML 1.3, a Custom Share API… these open up some great new possibilities for interacting with existing, and yet to be invented Applications. I’m sure Alex Gollner will detail them all. I’m really liking FCP 10.1 so far, I’m sure you will too. I can’t imagine going back to the creaky, old, 10.0 version. lol

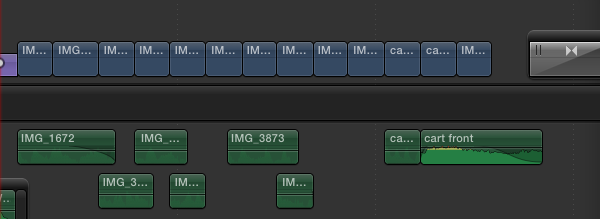
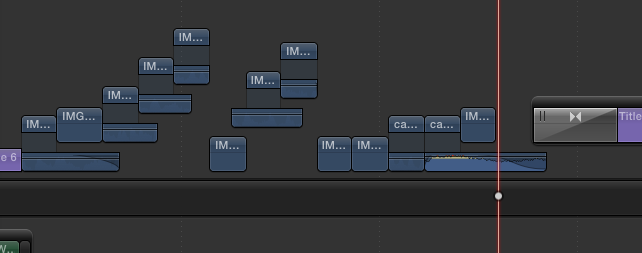
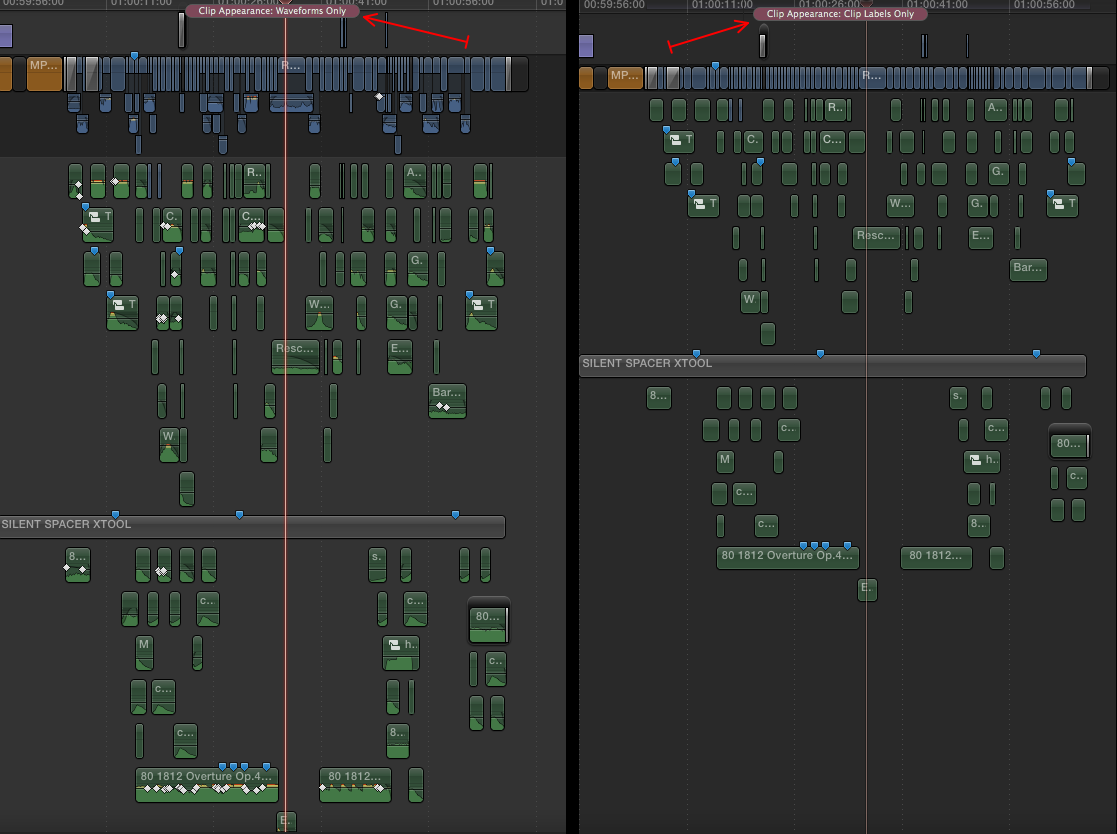
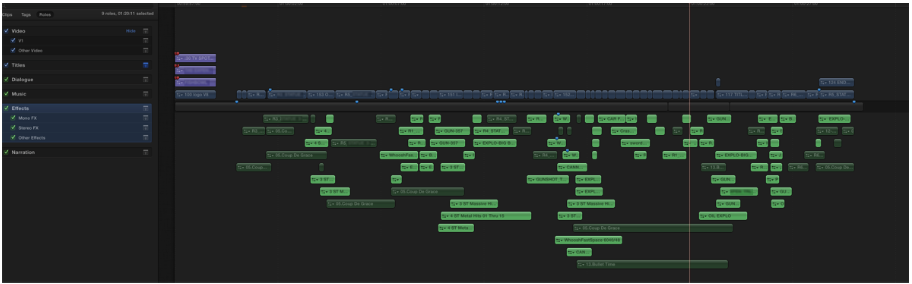
Just for laughs, here’s a couple shots of my screen after updating. All my work is still there. 🙂 Have fun!

A Random Job
uifin
A Big Library
NEW WINDOW

Track Tetris

Posted by fcpxpert1 on December 10, 2013
Posted in: Opinion. Tagged: FCPX, Final Cut Pro, Track Tetris, Tracks. 4 Comments

Track Tetris. If you’re an editor, you know exactly what I’m talking about. It’s a game we all play constantly while we work. I don’t really think about it. It’s just a part of the process of moving clips from a source – or within a timeline – into a section of the timeline containing other clips. I suppose I could’ve just said ‘editing’, but this is a very fancy blog.

Like anyone, I prepare the timeline for each move or cut. Set rollers, patch the source tracks, lock tracks, move audio or video up or down to adjacent tracks, make new tracks etc. Once I’ve cleared the way, I move or cut in the clips. Usually it’s fine. But sometimes, I overwrite something I didn’t intend to. I lose the game. No biggie, hit undo and try again. Like I said… I never really gave it a second thought.

youlose

Then… I started using Final Cut Pro X. And the game changed.

I’d be lying if I said it was easy. It wasn’t. Counting my years as an audio guy, I had over 2 decades of daily brain/muscle conditioning screaming that this trackless magnetic timeline thing was completely absurd. No tracks?! WTF!?

DRAMATIZATION – DO NOT ATTEMPT

keyboard-smash-o

However, being a glutton for punishment I persevered. And I discovered that it does work, quite nicely in fact.

Yes, I still move things around in the timeline. But only when I want to, not because I have to. And I never need to move things out of the way. Mostly all I need to do is set my source I/O, select an in-point in the timeline, and press a key. Or grab some clips in the timeline and move them. FCPX takes care of how it fits into the puzzle for me. I don’t clear the runway, I just land. 😉 If I don’t like the arrangement I can change it later. Right now, I can stay with the flow, in the groove, whatever you want to call it.

So… why do we need tracks again?

Tracks exist because they’re analogs for, uh… analog. Audio tape recorders, film projectors, videotape players… all these things pass media over a fixed head of some sort with which they need to be in perfect alignment. That paradigm carried over into the digital world. It made it easier to understand. But the change to a digital world is (mostly) done. We don’t need tracks for that anymore.

I Used to Calibrate Things Like This

Ampex_recorder_internals

What tracks are very good for, is visual organization in a timeline. Walter Murch’s famous FCP “classic” timeline is the perfect example of that.  Could he do something like that in FCPX? Well… If he needed it to look like that he probably couldn’t.  Although, I can think of some ways to approximate it, but it’d be like using popsicle sticks and glue to build a house or something. So how do you visually organize a timeline in FCPX? you ask. Secondary Storylines and Roles, that’s how.

Admittedly, visual organization in the FCPX timeline needs some work, it’s far from perfect. But the foundation is there and it’s solid. Assign Roles properly, and you can see where everything is instantly. Maybe not how you’re used to seeing things, but not much about the FCPX timeline works the way you’re used to anyway.

In fact, if you’re like me and are more concerned with fitting all your clips onscreen than carefully arranging things, FCPX works really well right now. I have no idea how Mr Murch was able to work in that timeline. He must have had a really big monitor!

Here’s an illustration from an article comparing FXPX to FCP7 I wrote for Creative Cow some time ago… It’s a visual organization comparison of the same cut in both timelines. As you can see, my X timeline looks just like my 7 timeline. I was confused and terrified by the Primary Storyline back then, and didn’t use it. Foolish Noob! 😉

cowgrab
In 7, if I hadn’t cut it, I’d have no clue what any of those clips were just by glancing at the timeline. In X, select the desired Role(s) in the timeline index and there they are. Yes, you should be able to have clips with the same Role “stick” together. And preferably be able to choose where roles are placed vertically. VO at the top, then DIA, then FX, then MX or whatever you prefer. Once Apple figures that out, and I think they will, that will replace the last visual function that I think tracks still serve.

Organizationally, Secondary Storylines can already do what tracks do, and they’re more flexible. If you have a clip or clips cut into little pieces, and you’d like them to stay together rather than magnetically flying toward the Primary Storyline, Stick ’em in a secondary. Voila! A track. A track that you can grab and put wherever you want it in the timeline.

secondary

And if you connect your secondary to the first frame of the Project, all your little clips will stay right where they are in the timeline. They’re not connected to the Primary so they won’t unexpectedly move when you move clips in the Primary storyline. Great for Music beds and other things like that.

trax

I agree that there’s work to be done with Roles. I’ve talked a little about the visual aspects, and there are audio aspects as well. Some sort of mix buss a Role(s) could be assigned to. Sends, Returns, things like that. Being able to mix a Role might be nice, though I’d rather do that in a DAW. And honestly, if Roles had all the Visual and Audio things I’ve talked a little about, I’d be OK with a trackless DAW. (don’t bother flaming me… I get it, just speculating here…)

I realize they don’t meet everyone’s needs, but for me, Roles and Secondaries can do much of what tracks did, and more. Even with their current imperfections. Combined with the Magnetic, Trackless Timeline, they allow me to just cut stuff  without stopping to think about where it fits in the timeline. I can focus on what, not how. I like that. 

But here’s the best thing of all about FCPX. No More Track Tetris!! I hate that damn game…

More CoreMelt Tracking Fun in FCP X

Posted by fcpxpert1 on December 9, 2013
Posted in: FCPX At Work, Workflow. Tagged: FCXP TOOLS. 4 Comments

Another quickie… You’re probably familiar with Slice-X with Mocha from CoreMelt. If you’re not, you really should be. Mocha powered Planar Tracking for FCPX. Rotoscoping, rig and object removal, and more, without ever leaving the app.

Well, they’ve just announced a new, related Plugin called Track X. It’s currently in beta, but soon you’ll also be able to track graphics and text in FCPX.  No need for round tripping anymore, you can do it all in the FCPX viewer. Uses the same Mocha engine as Slice X. It look really nice, and really easy. A demo video is posted here.

No pricing yet but, like Slice X, I’m sure it’ll be worth every penny. OK… Back to waiting for the FCPX update… tick-tock….

trackx_step2

Simple vs. Complicated

Posted by fcpxpert1 on December 6, 2013
Posted in: Opinion. Tagged: FCP 7, FCPX, SIMPLE. 5 Comments

One of the reasons I prefer cutting in FCPX is that, in my opinion, it is much simpler to cut in. I’ve touched on this before. . . by simpler, I mean I spend less time doing technical manipulations in the app, and more time doing creative manipulation. You know… editing.

To me, the trackless, magnetic timeline, audio components riding with video clips, one inspector window, clip skimming, real time effects preview and a raft other things make cutting in X simpler, faster, and more fun. That’s not to say there aren’t complicated or confusing things in FCPX, there most definitely are. I’ve never been one to claim that X is perfect or better at everything than every other NLE available. It isn’t. Every NLE has it’s strengths and weaknesses, anyone who claims otherwise is deluded.

I believe that for most editing operations, if there is an easy way to do something then that is a better way to do something. And it’s not just true for FCPX. There are simple ways of doing seemingly complicated things in every NLE. But, maybe because editing software has been so complex and arcane for so long, sometimes the longer you’ve been editing, the more likely you are to come up with complicated ways of doing things. I know I’m generalizing wildly here, so calm down. 🙂 This generalization though, brings me to the point of this particular post.

I recently joined a couple Editors groups that are not focused, or even terribly interested in FCPX. Ya know, because nobody uses it. I like FCPX and I’d like to change that though, so I ‘m in.
Anyway. . . there were a couple FCP 7 questions posted there on which I commented.

I’m not posting this to try and come off as some sort of genius know-it-all. I’m not… I’m just lazy. lol
I look for the simplest ways to do things, and this exchange seemed to me to be a perfect illustration of the Simple vs. Complicated mindset.

Question: “how do you do a Ghost image in FCP7? You know – a guy turns around, turns around..”

First answer: “Layer same shot – superimpose w/ 8point matte key”
Follow up: “or play around with visibility”

A perfectly valid, but complicated, response. Layer x number of video tracks, offset each one by x frames, apply and adjust a mask or opacity on every clip. Keep tweaking until it looks right.

My response? “Effects Tab ->Video Filters ->Time folder-> Trails or Echo Filters.”  Simple, right?
Here’s the other one. . .

Question: “How do you maintain aspect ratio while adding transition effects in Final Cut 7- particularly a cross zoom?”

Translation… “I have a cross zoom between two (16:9 or something) matted clips but the zoom fills the frame. how do I keep the 16:9 matte during the transition?”

First answer: “which version of FCP? Sequence settings? codec working with?”
Followup: “Apply the transition, and simply nest (Option+c) the 2 segments that are part of the transition: the A side, and the B Side: (. . .) Once these 2 clips are nested in a single new one, apply the Matte effect, and use the drop down Widescreen option in the effect. Here you’ll be able to choose the aspect (1:66, 1:85, 2:35, etc), and you should be able to finesse the matte further if needed. (. . .) If you want to load the nested clip in your sequence into the source viewer, you’ll have to right click and “Open in viewer”.

Again, a perfectly correct, but complicated response. Apply the transition, nest the 2 clips and transition, apply a filter, and adjust it to taste. But be careful with the nested clip. If you need to adjust the transition you’ve got to step into the nest to do it.

My response? “Just put (this) above your transition, adjust it’s size to match your crop. done.

mask2

Simple.

EDIT: Oliver Peters has an interesting post on simplicity at his blog. He’s always a good read, check it out.

Someone Didn’t Get The Memo

Posted by fcpxpert1 on December 4, 2013
Posted in: FCP X, FCPX At Work. Tagged: FCPX, Final Cut Pro X, Finnish, Reality TV, Time-lapse photography. Leave a comment

While we wait patiently for The Mac Pro Tube and the next revision to FCPX , I thought I’d post this. It’s been kicking around for a month or so but it’s worth a repost. A screen grab time-lapse of Editor Jesse Jokela cutting a Finnish reality show, Beyond Human Boundaries, in FCPX. Apparently, he didn’t get the memo that nobody uses FCPX. Shot on a Canon 5DMarkIII, The show was cut in FCPX and graded in Resolve Lite. This particular episode was also mixed in FCPX 10.0.9. I guess you can do audio in FCPX too. What a surprise! 

Seasons 1&2 of the show have been hugely successful in Finland, and have also been broadcast in over 130 countries worldwide (through Discovery and BBC). They are working on English dubbed versions now for wider distribution. Jesse says he made the time lapse for himself “…and to give a glimpse to an outsider of how much goes into editing an episode of tv.”  I suggest watching the time-lapse full screen in 1080p. It’s pretty cool, even for a jaded editor like me. 😉

And here’s a trailer, in Finnish, for the series.

Posts navigation

← Older Entries
Newer Entries →
  • Recent Posts

    • FCP 10.6 – Here We Go Again!
    • FCP Comes Through-An (old) Anecdote
    • Happy New Year!
    • LumaTouch – fcpxml Export to FCP X
    • Drive By Post – Multi NLE Workflow Fun!
    • 🎅🏼Christmas Crap – An FCP X Re-Gift!
    • FCP X update and Mojave Menu Glitch
    • Quick Tip – Save Open Windows On FCP X Quit
    • Great Doc about FCP X
    • Fade To Whatever – Dissolves in FCP X and Premiere
  • Post Finding Thing

  • Enter your email address to follow this blog and receive notifications of new posts by email.

  • Always Interesting

    • The JetHead Blog
    • digitalfilms
    • www.philiphodgetts.com/
    • Alex4D
  • Nerd Department

    • Create account
    • Log in
    • Entries feed
    • Comments feed
    • WordPress.com
Create a free website or blog at WordPress.com.
The JetHead Blog

... the world from 40,000' at 500 mph.

digitalfilms

a blog by Oliver Peters

www.philiphodgetts.com/

Just another WordPress.com site

Alex4D

Deep Thoughts about FCP X, and why you should be using it.

Final Cut Pro X Babbling
Create a free website or blog at WordPress.com.
Privacy & Cookies: This site uses cookies. By continuing to use this website, you agree to their use.
To find out more, including how to control cookies, see here: Cookie Policy
  • Subscribe Subscribed
    • Final Cut Pro X Babbling
    • Join 241 other subscribers
    • Already have a WordPress.com account? Log in now.
    • Final Cut Pro X Babbling
    • Subscribe Subscribed
    • Sign up
    • Log in
    • Report this content
    • View site in Reader
    • Manage subscriptions
    • Collapse this bar
 

Loading Comments...